Server virtualization with KVM and OpenVZ Containers
ANOOP V M
March 31, 2015
Server virtualization is a method of dividing computer resources into multiple isolated environments. It hides server resources, including the number and identity of individual physical servers, processors, and operating systems, from server users. Followings are common usage scenarios.
- Server consolidation: Server consolidation allows an organization to decrease the number of physical servers, by moving their applications into virtual environments. This leads to savings in hardware costs, rack space, electricity, and management efforts.
- Security: It provides improved security by putting each network service (like web server, database server,mail server, etc.) into a separate isolated virtual environment. Security hole in one will not affect other services.
- Hosting: OS-level virtualization is used in hosting services. Service providers can use this to
- sell affordable cheap VEs to their customers.
- Software development and testing: Developers and testers often need access to a handful of Linux distributions, and may need to reinstall those from scratch. Using virtualization, they can operate multiple distributions using a single server, without rebooting, with native performance. In addition to these, creating and cloning a virtual environment is very easy.
- Education: By using VE, students can play with different operating systems in a single physical device.
KVM and OpenVZ Containers
Kernel-based Virtual Machine (KVM) and Container-based virtualization are two commonly used virtualisation techniques.
KVM is a full virtualization solution for Linux on x86 hardware containing virtualization extensions (Intel VT or AMD-V). Using KVM, one can run multiple virtual machines using unmodified Linux or Windows images. Each virtual machine has private virtualized hardware such as a network card, disk, graphics adapter, etc. In KVM an extra layer of abstraction between the operating system and hardware will be present, and some performance issues may occur depending upon the physical device. Disk space and RAM will be reserved and disk volumes will be encrypted in KVM. KVM gives full virtualisation – its kernel or virtual hardware is not shared with any machine.
OpenVZ is container-based virtualization for Linux. OpenVZ creates multiple secure, isolated Linux containers on a single physical server. It enables better server utilization and ensures that applications do not conflict. Each container acts and executes exactly like a stand-alone server. Any container can be rebooted independently and have root access, users, IP addresses, memory, processes, files, applications, system libraries and configuration files. In container-based virtualization, disk space and RAM will not be reserved, it will be allocated dynamically. Its kernel is shared among containers and there is no encryption for disc volume.
Virtualization with ProxMox
Proxmox VE is an open source virtualization management solution for servers. It is based on KVM virtualization and container-based virtualization and manages virtual machines, storage, virtualized networks and HA Clustering. It is optimized for performance and usability. Enhanced Web-based management interface makes it easy to use , there is no need to install any additional management tools.
Try in Virtual Box
Following paragraph will help you to try ProxMox VE in Virtual Box.
Step :1
Download ProxMox VE image from http://proxmox.com/en/downloads/category/iso-images-pve .
Step:2
Create new virtual machine in your VirtualBox by selecting type Linux and version. Ubuntu 64 bit or any other debian based version. Allocate RAM 1gb as minimum requirement and choose disc and other options best suited to you.
Read more about minimum requirement at http://proxmox.com/en/proxmox-ve/requirements
Step:3
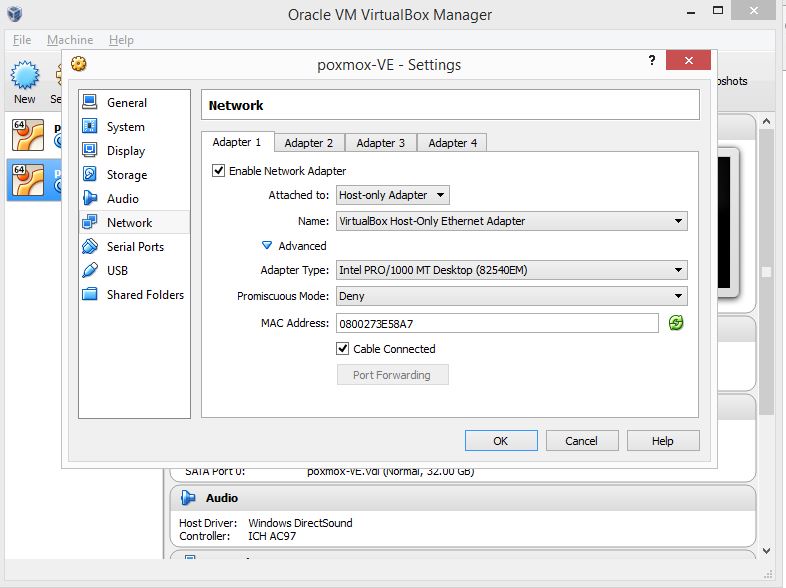
Enable network adapter and select Host-only adapter. Then set image file or CD/DVD in storage tab and start the machine.
Step :4
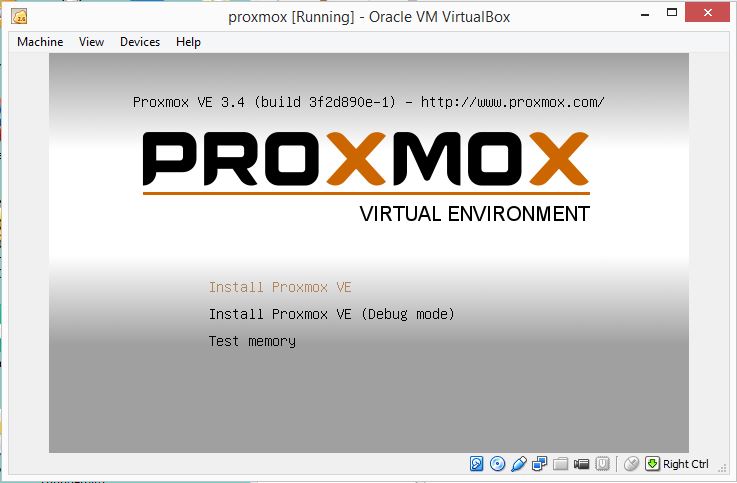
Install Proxmox VE.
Set country, time zone and password. This will be your log in password to Proxmox VE.
Step :5
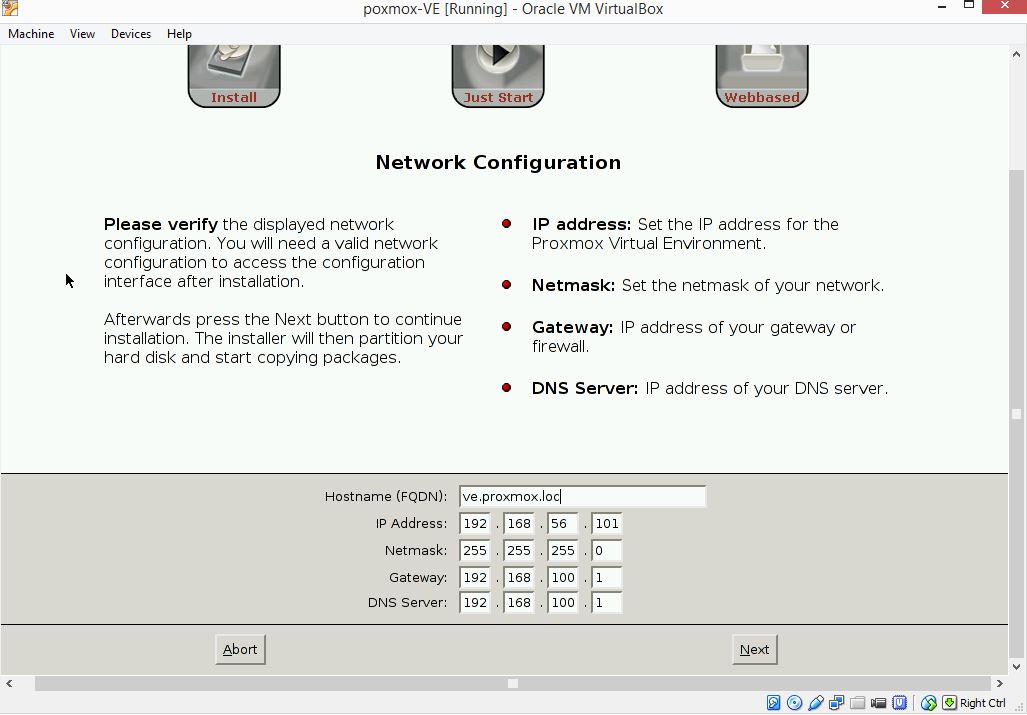
Set host name, a fully qualified domain.
By pressing next, Proxmox VE installation will be started.
Step : 6
After completing installation remove CD and reboot machine.
First boot may take a few minutes.
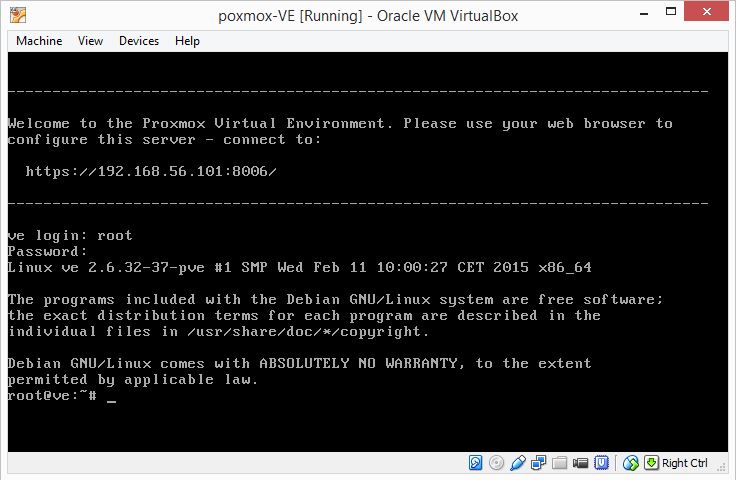
Login as root with password you set at beginning of installation.
Step :7
You are almost done.
Now go to ip displayed in proxmox screen(example: https://192.168.56.101:8006)
It is available over https only.
Now you might reached in Proxmox VE web interface. Login with root and password set earlier.
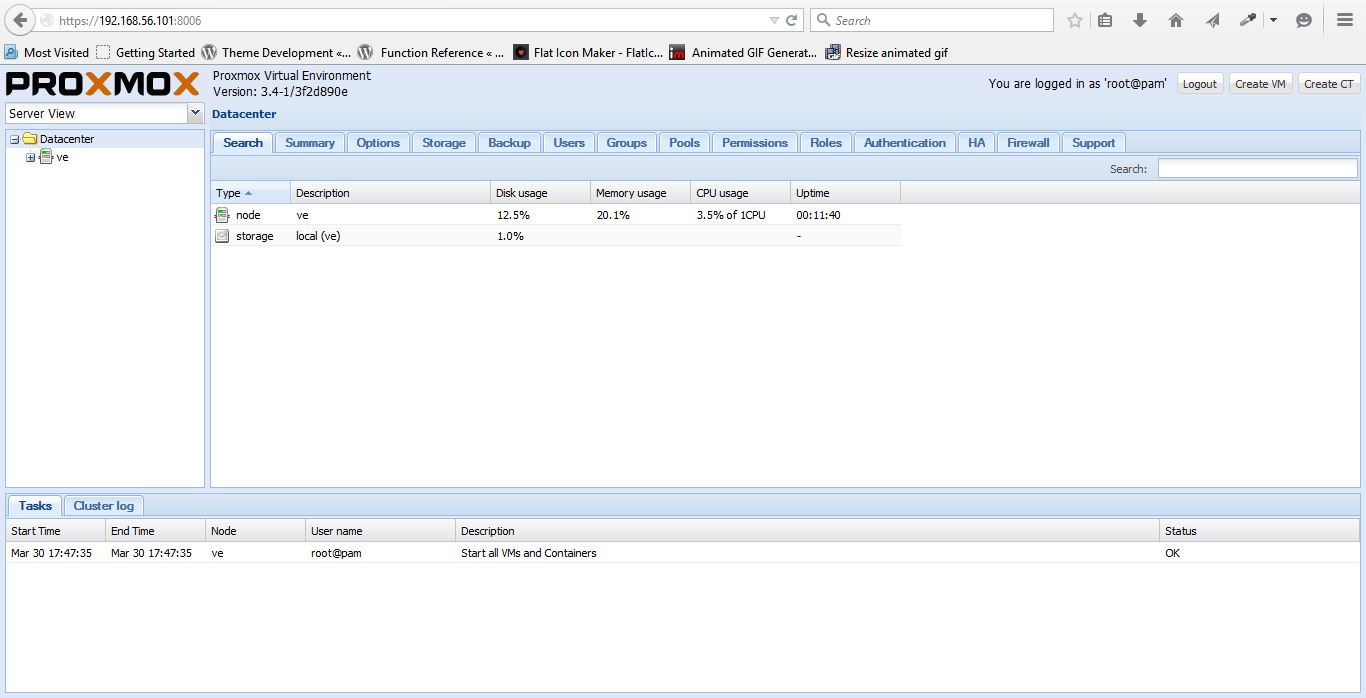
You can create virtual machines and Open Viz containers using graphical interface in it.


Leave a Reply