AWS Lambda Tutorial: Step by step instructions to create a scalable web application – Part 3
Arunbalan
January 27, 2016

Create and configure Lambda functions and uploading Lambda application packages to AWS
Step 1: Create And Configure the Lambda function.
Sign in to the AWS console and select the Lambda . Then follow the instructions to create a lambda function. This session shows the steps to create first lambda function- CreateAccount for our application . Follow same steps to create two more functions, that are UpdateStatus andgetAllStatus.
- Click on Create A Lambda Function button.
- Select blueprint, choose the microservice-http-endpoint blueprint
- Configure function, specify the following values:
- Enter a function name (for example, CreateAccount ).
- Select Node.js from the Runtime list.
- For the IAM Role , create a role by choosing the Basic with DynamoDB from the list.
This role template has a predefined access policy that grants sufficient permissions for AWS actions that your Lambda function needs.If you need more access permissions for your needs you can create a new IAM role and assign a name (for example, lambda_dynamo ) as the execution role. Here we use the predefined template Basic with DynamoDB. Press Allow button then click Next.
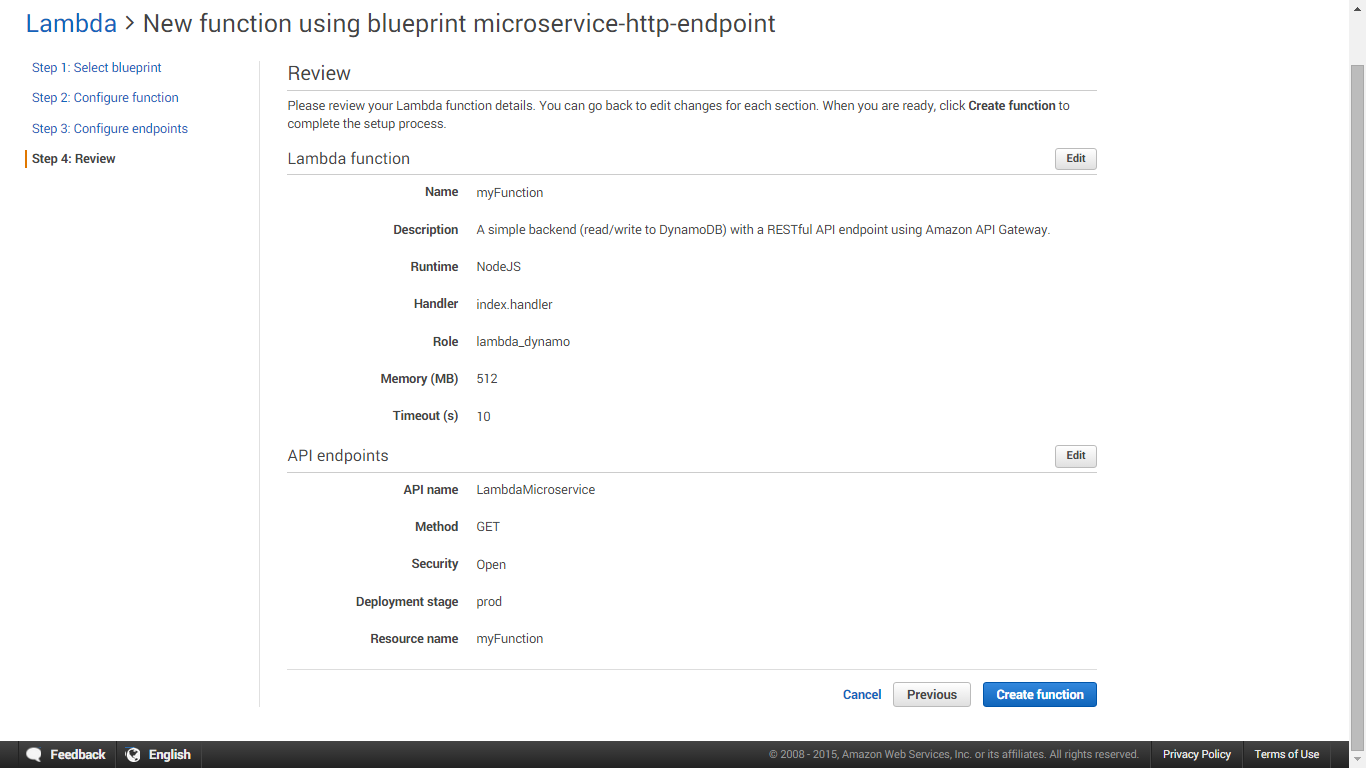
- In Configure endpoints , specify the following values:
- Give a name to the new API . Here we used the same name of the lambda function (CreateAccount ). After the API is created, it will appear in the Amazon Gateway console.
- Leave the Resource name as it appears in the console. It maps to the name that you specified for your Lambda function, so do not change this value.Here also we gave the same name of the lambda function( CreateAccount ).
- Choose a method from the list. Here we have chosen GET method.
- Leave the default prod for Deployment stage .
- Choose Open from the Security list.
Note: Make sure you have selected the Open from the Security list. Because we create this function for invoke it from web browsers without authentication process.
You will get a following screen make sure your configurations and click Create function .
Step 2: Creating and Uploading the Lambda Application packages.
There are various options to deploy lambda function to aws. First one , we can use the editor available in Lambda console. and the second option is uploading a lambda package from our local machine to aws as a zip package. Final option is using lambda package stored in the amazon S3. In this scenario , we use the second method , that is directly uploading our lambda package from local machine to AWS lambda. It is because we are using MySQL database in RDS for this application. For that we need to include additional MySQL module to our package. we can’t do this in the editor available in Lambda console.
A:Create a Lambda function deployment package
- Create a folder ( LamdaApp ) in your local machine and create three sub-folders inside it. You may give those names as CreateAccount , UpdateStatus and GetStatus Respectively. After creating the folders install necessary dependency packages to all these three folders.
- You need to install Node.js platform.
- Install the Node.js platform. For more information, go to the Node.js website at http://nodejs.org/.
- Install dependencies in each folder. First enter in the first folder named CreateAccount and install those required modules.
- For MySQL module type this in terminal.
sudo npm install mysql
- For File System module type this line in terminal.
sudo npm install fs
- This will create a directory called node_modules and install the modules inside it. The mysql module is entirely written in Node.js, and implements an async MySQL.
- Copy the node_modules folder and paste it to other two folders (UpdateStatus and GetStatus).
- Now we have 3 folders and their required dependency packages in them. Next step is to create lambda function.
B: Create lambda function and html contents.
Inside each folder create the node.js file and other required files for the execution of the functions such as files containing HTML contents
CreateAccount
- In CreateAccount Folder Create following files. Files contents are available in github . :https://github.com/Nethram/LambdaDemoApplication
- Add contents of the index.js as given in the github file.which contains the actions to be performed after getting required parameters.Modify the lines 26-30 and add credentials for your RDS DB instance that you have created earlier.. Add the name of DynamoDB table in line number 58.
- The successful.txt contains the HTML markups which is to be shown after successfully creating an user account.
- The unsuccessful.txt contains the HTML markup that will return after errors occurred.
UpdateStatus
- Inside the updateStatus folder Create following files.
- Add contents of the index.js as given in the github file.which contains the actions to be performed after getting required parameters such as username, password and status.Modify the lines 25-29 and add credentials for your RDS DB instance that you have created earlier. Add the name of DynamoDB table in line number 61
- The success.txt file contains the HTML markups which is to be shown after successful updating of users status.
- The incorrect.txt files contains the HTML content which will show after incorrect user password entry.
- The noexistuser.txt contains the HTML contents which show the given username is not created an account. index.js.
GetAllStatus.
- Inside the updateStatus folder Create following files.
- Add contents of the index.js as given in the file in github. this is the page which executes when we trigger the lambda.Modify the lines 26-30 and add credentials for your RDS DB instance that you have created earlier.Add the name of DynamoDB table in line number 71.
- The success.txt file contains HTML markups which is to be shown after successful authentication of user credentials. This contains the HTML format of returning every user’s status.
- The incorrect.txt file contains the HTML content which will show after incorrect user password entry.
- The noexistuser.txt contains the HTML contents which show the given username doesn’t hold an account.
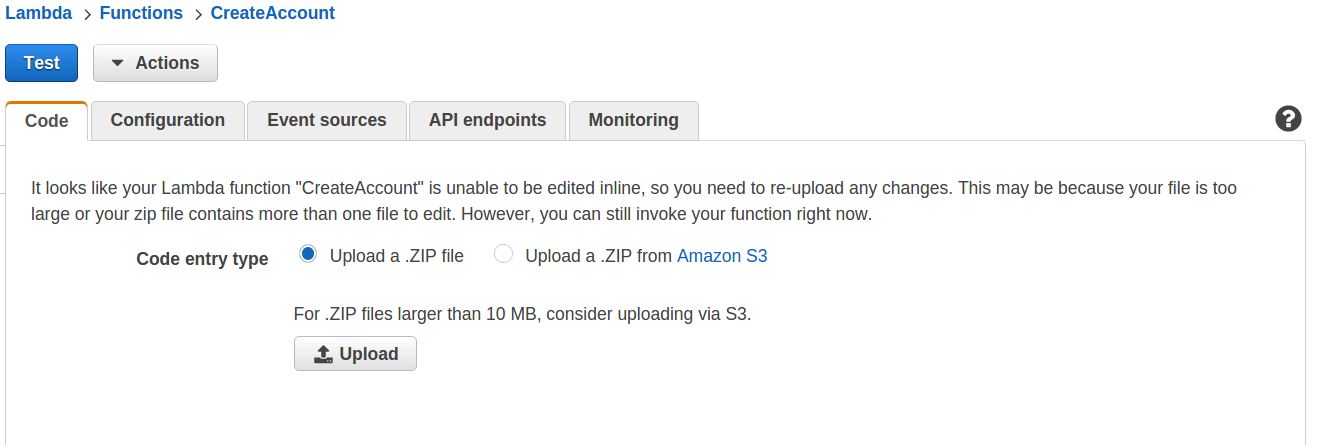
C:Uploading the Lambda package
- Now we have everything ready inside the LambdaApp folder. The next step is to compress the contents of those three subfolders and make zip files. You need to make sure that you are compressing the contents of each folders and not the folder itself. Upload the zip files to the lambda console of each lambda function. See the image below, there is an option to directly upload your zip packages to it or you can upload the files to amazon S3 then configure the third option. Here we are directly uploading the application package to the lambda.
- Test the function by clicking the Action button and select Configure test event option. then on the next window configuring a sample event by giving the simple JSON body. See this image.
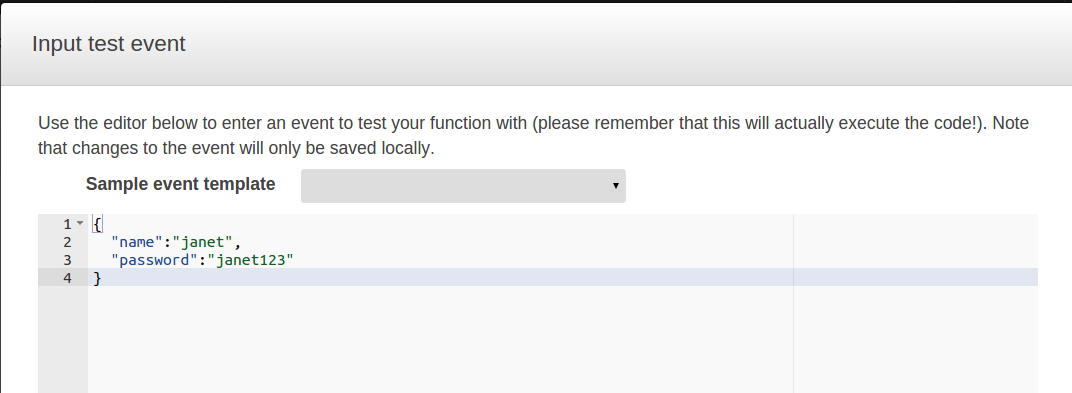
For example, after uploading the CreateAccount zip package we test the function by giving the parameters such as name and password. The JSON text event body is like this.
     {
      "name":"janet",
      "password":"janet1234"
     }
- Click on Save and Test button. Then the given parameters will be passed to the lambda function and it will execute,ie it will create an user account. The result will be shown in the console. The console will show error if there is any mistakes in your lambda function code.
- Check your database table and ensure the new item entry.
- Follow the same steps to upload and test other two lambda function packages. And use the test event body as follows. For UpdateStatus function. use this.
     {
        "name":"janet",
        "password":"janet1234",
        “status”: “This is my test status”
     }
make sure that your dynamoDB table has new entry after the test.
For getAllStatus function. use the test event shown in the first example.
Leave a Reply